Outside the comfort zone
Is painful but it’s also where the magic happens.
N x

Is painful but it’s also where the magic happens.
N x
Hello again!
I have another DIY project for you!
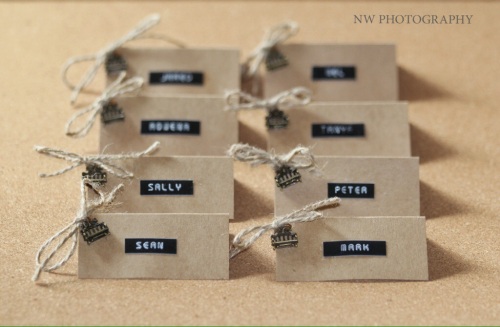
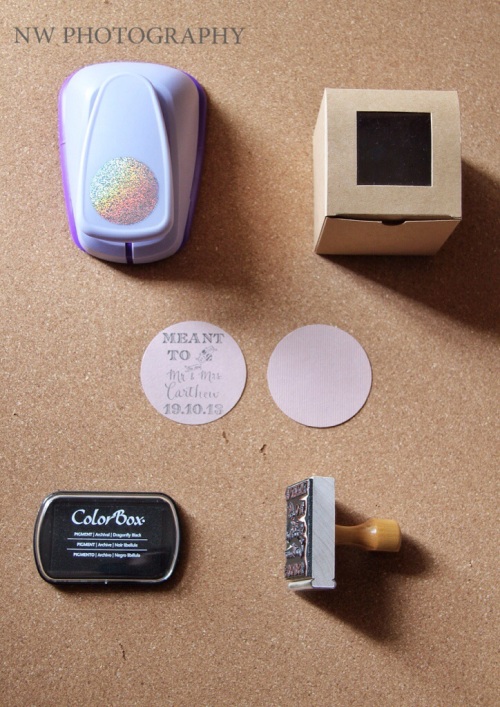
How CUTE are these place cards!! They were in keeping with our vintage theme but also tied in the personal touch of the park bench. They were really cute and I loved that I could bring a part of our story into the detail of the day. They were a little fiddly but were so worth it.
I will list each item you will need (for 80 place cards) along with the listing for where I found them and other places to find similar items if you’re not local to Perth. First here’s what we will be wording towards:


One big mistake I made was gluing the label to the place card. The sticky on the tape was not strong enough to adhere to the place card, so I glued the entire label and then stuck it on. Unfortunately the glue sunk into the embossing and ruined it. So what I did to fix that was to glue small dots on either side of the name with some craft glue. When you’re punching the names out keep this in mind and leave space either side of the name.
Once again set up a little production line, get friends and family to help you if possible or dive into the project yourself, put on some good TV have a cup of tea (or glass of wine!!) and get crafty!
I hope you enjoyed this post, please feel free to ask any questions in the comments section.
My next post will be table numbers!
N x
Hello again,
I hope you all liked my first crafty type post. I really enjoyed putting it together. This one is pretty simple, once you have all your supplies its just a matter of setting up a production line and you’re good to go! Its great to have your Fiancé or Bridesmaids help out with this project too!
I doubled up our cake and favours for our guests, it was a great way to save money but still add a personal touch. My Husband and I had a small cutting cake for the traditional cutting of the cake and then the 80+ cupcakes were boxed up nicely and placed at the exit for people to take as they left.

The supplies you will need (and where you can find them) for 80 complete boxes are as follows:
Tips:
I loved how personalised these were and the vintage feel of the presentation. You could use any theme and again this project would be great for a baby shower or party of any kind!
Enjoy, please ask any questions you might have in the comments section.
N x
I’ve been watching some documentaries on fashion and envy the passion and creativity that flows through designers. They’re so tactile and always seem so alive!!! You want a part of it you know!? To be so moved and lit up constantly!!! I want in! Photography certainly lights me up and observing the simple pleasures of life, there’s nothing better. I need to figure out what else lights me up and do more of it.
Here’s some flowers – they’re for you!
N x

